Change Public Network to Private Windows 10 Toms Hardware
You can enable DNS over HTTPS in Windows 10 (DoH) in Windows 10 using ane of the methods available in the OS, including Settings and Registry. DNS-over-HTTPS is a relatively young spider web protocol. Its main goal is to increase user privacy and security by preventing eavesdropping and manipulation of DNS data past man-in-the-middle attacks by using the HTTPS protocol to encrypt the data betwixt the DoH client and the DoH-based DNS resolver.
The plan to support DoH in Windows ten was revealed with a number of principles Microsoft is going to use when implementing the feature in the OS. Microsoft planned to implement support for encryption of DNS traffic dorsum in 2019, merely users were able to try this new feature only in 2020. So Windows 10 Build 19628 was the first build to include the DoH back up.
This post volition show you how to enable and configure the DNS over HTTPS (DoH) feature on Windows 10.
Enable DNS over HTTPS in Windows x
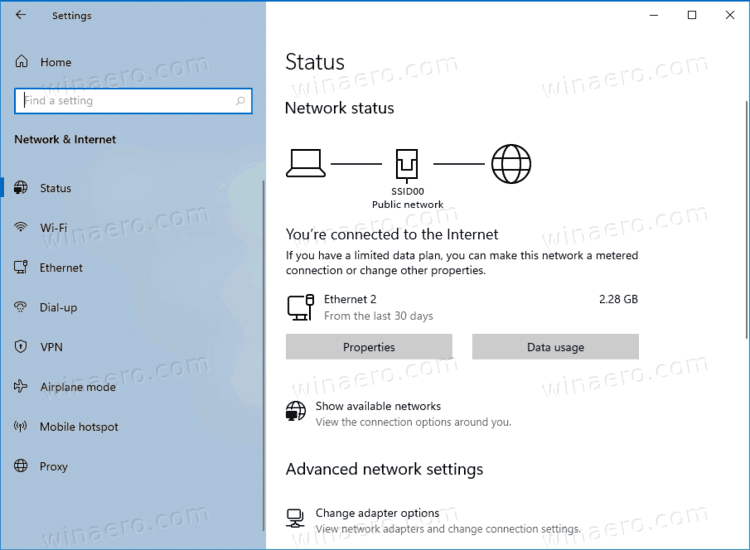
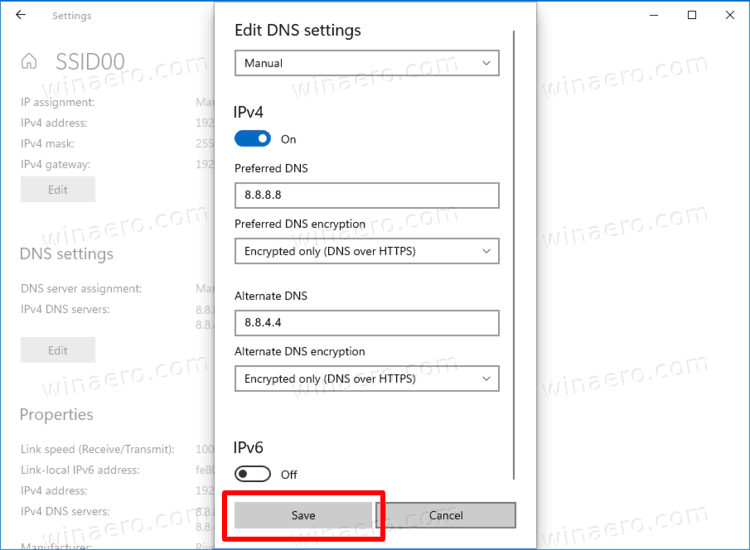
- Open the Settings app. Yous can press Win + I to open it faster.
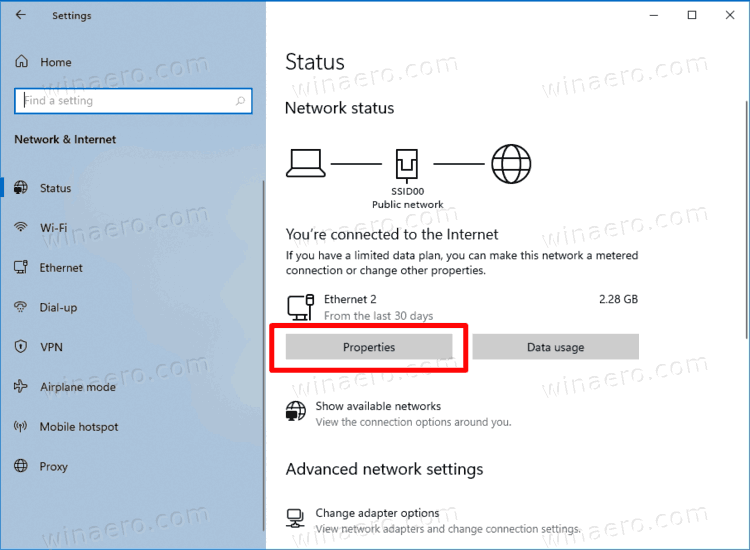
- Navigate to Network & cyberspace > Status.
- Click on Backdrop.
- On the next page, click on the Edit button under DNS settings.
- Select Manual.
- Specify DNS servers that support DoH (see the listing in the adjacent chapter).
- Select Encrypted just (DNS over HTTPS) from the In the Preferred DNS encryption driblet-down menu for each of the servers.
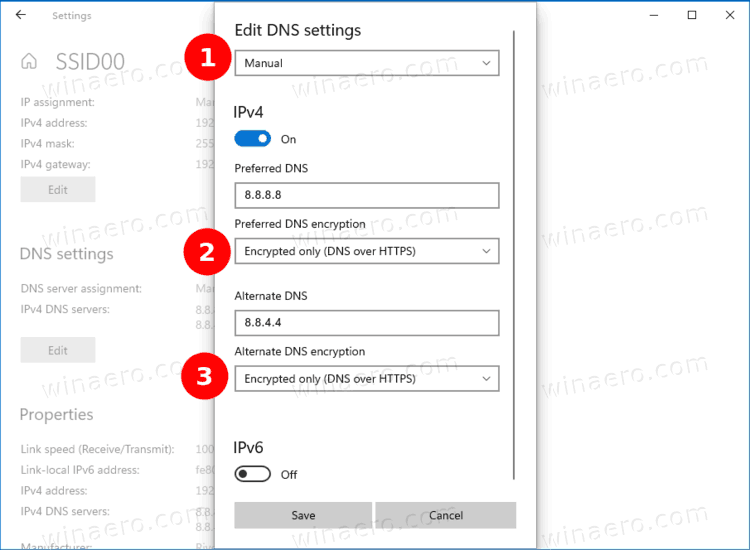
- If y'all are using IPv6 DNS, repeat the previous footstep for the its configuration.
- Finally, click on the Save button.
Yous are done. To find that DoH actually works, curlicue downward the contents of the network settings page. You should see "Encrypted" adjacent to the DNS address value on the Properties page.
The list of public DNS server that support encryption can be found in the table beneath.
The listing of DoH-enabled servers
You can use the following public DNS over HTTPS servers.
| Server Owner | IPv4 addresses | IPv6 addresses |
| Cloudflare | 1.1.1.1 i.0.0.one | 2606:4700:4700::1111 2606:4700:4700::1001 |
| 8.8.8.8 eight.eight.four.4 | 2001:4860:4860::8888 2001:4860:4860::8844 | |
| Quad9 | 9.9.nine.nine 149.112.112.112 | 2620:atomic number 26::iron 2620:iron::fe:9 |
Even so, if your Windows 10 version doesn't allow to plough on DNS over HTTPS in Settings, e.g. the options are missing, you tin utilize a Registry tweak to do the same. It is an alternative method to the Settings app.
Plow on DNS over HTTPS in the Registry
- Open up the Registry Editor. Printing Win + R and blazon
regeditin the Run box. - Get to the following Registry central.
HKEY_LOCAL_MACHINE\Organisation\CurrentControlSet\Services\Dnscache\Parameters. - On the correct, modify or create a new 32-Bit DWORD value EnableAutoDoh.
- Set its value to
2.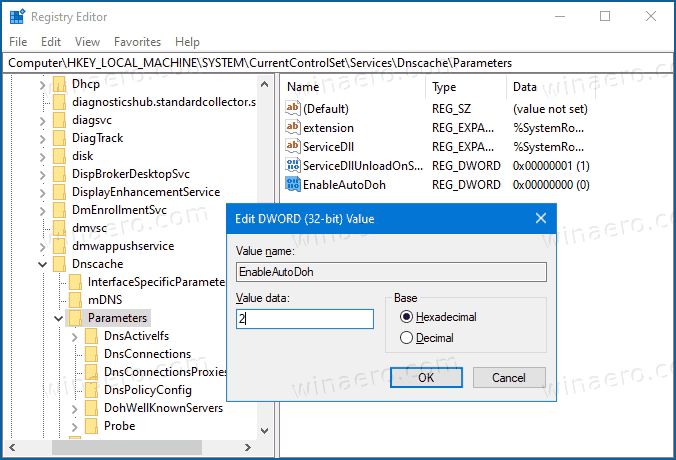
- Restart Windows 10.
This will activate DNS over HTTPS, so Windows 10 will starting time sending and receiving DNS traffic through secure, encrypted servers. However, you demand to change the DNS server address to one from the above mentioned table. Here is how you can set a DNS server accost.
Alter Server Address after enabling DoH
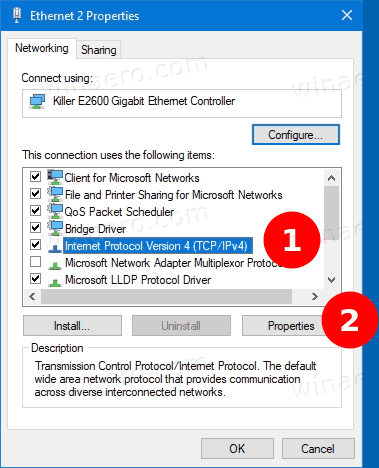
- Open the archetype Control Panel. Press Win + R and type
commandin the Run box, so hit Enter. - Go to Control Panel\Network and Internet\Network and Sharing Center.
- On the right, click on Change adapter properties.

- In the Network Connections window, double-click your network connectedness.
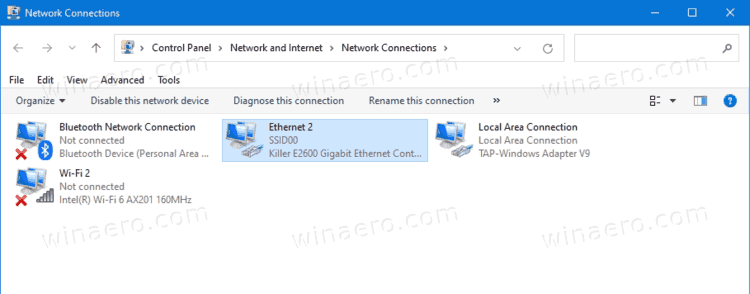
- Click Backdrop in the next window.
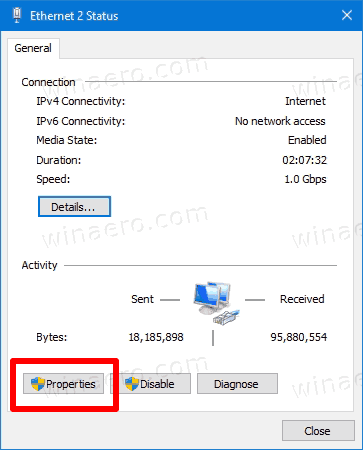
- In Adapter Properties, select the Cyberspace Protocol Version 4 (TCP/IPv4) entry, and click on the Properties button.
- Select the selection "Use the following DNS server addresses:" on the Full general tab. Enter the DNS server address that supports DoH.
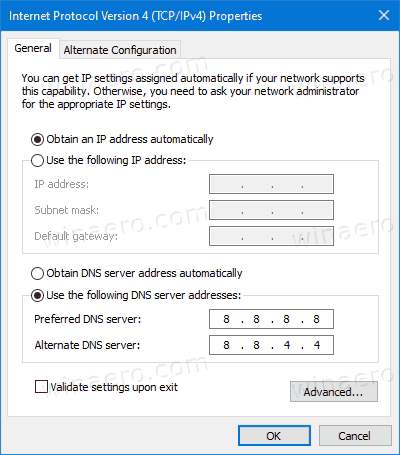
- If your network configuration includes IPv6, specify the IPv6 servers for the Internet Protocol Version half dozen (TCP/IPv6) option.
- Click OK to apply the modify.
You are done.
Finally, you can check if DNS over HTTPS works for yous after applying the Registry tweak and the in a higher place mentioned changes. Yous can verify it'south working by seeing no more evidently text DNS traffic from your device.
Verify that your DNS over HTTPS settings work
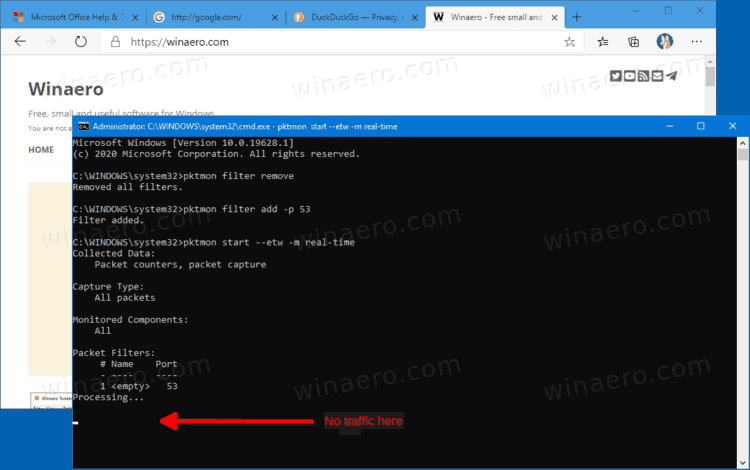
- Open a command prompt as Ambassador.
- Type and run the following command to reset network traffic filter:
pktmon filter remove. - Type and run the following command to add a traffic filter for port 53, the port classic DNS uses:
pktmon filter add -p 53. - Run the following command to start a real-fourth dimension logging of traffic:
pktmon offset --etw -1000 real-time. - All port 53 packets will be printed to the control line. If DoH works, you lot should non meet traffic here.
That's information technology.
Related manufactures:
- Enable DNS over HTTPS in Microsoft Edge
- How to Enable DNS over HTTPS (DoH) in Opera
- Enable DNS over HTTPS in Chrome (DoH)
- Enable DNS over HTTPS in Firefox
Support us
Winaero greatly relies on your support. You can assist the site go along bringing you interesting and useful content and software by using these options:
If you like this article, please share it using the buttons beneath. Information technology won't accept a lot from you, simply it will help us abound. Thank you for your support!
0 Response to "Change Public Network to Private Windows 10 Toms Hardware"
Post a Comment